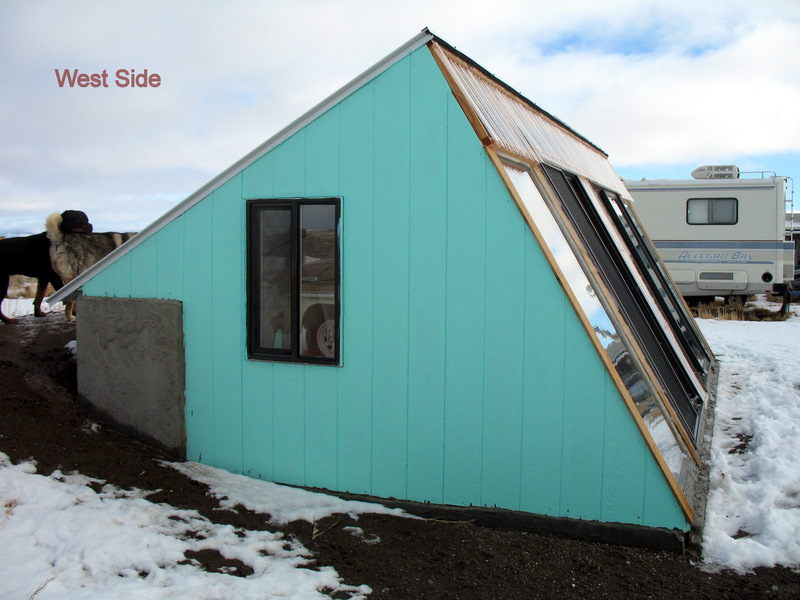
Here is the west side of the greenhouse. Notice the window that will help with ventilation during the summer. Notice the grey patch on the left. That is a seal over the top of the cement blocks to make it look a little nicer and to help protect the blocks. I may push dirt up against that area and terrace it.
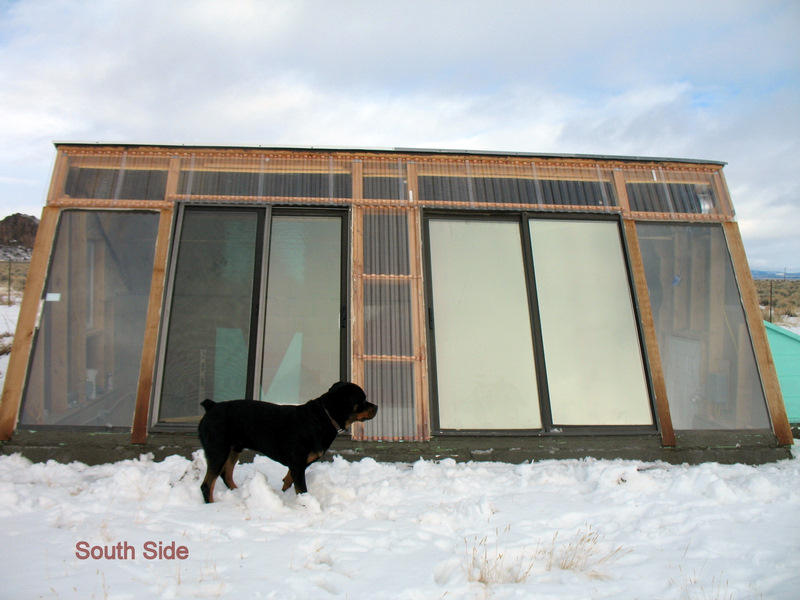
Here is the south side. I still have little holes to patch. I'm using that foam that comes in a spray can that's called "Great Stuff". The two sliding glass doors in the middle open and I took a sliding glass door apart and just used the glass on each end. All the glass is still double paned. I was told that it is better to keep it that way for the insulation factor. You don't lose that much light spectrum coming through the double paned windows.
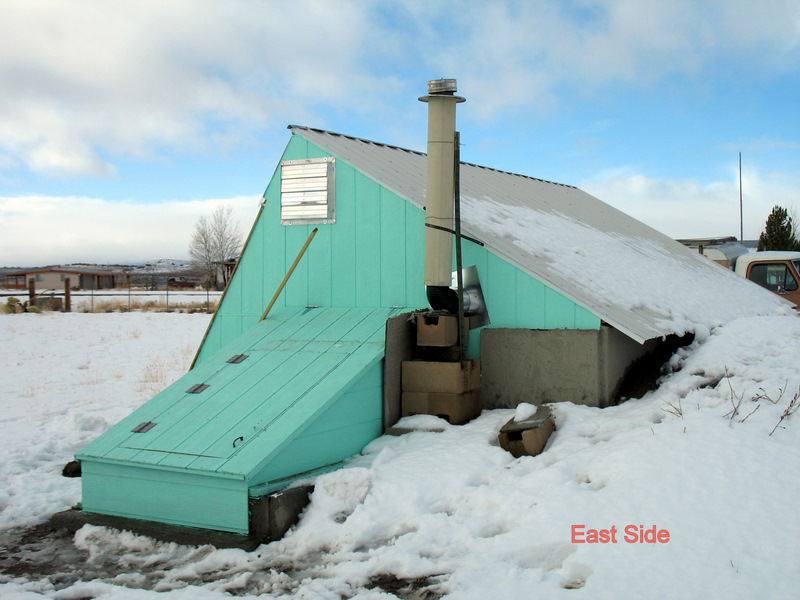
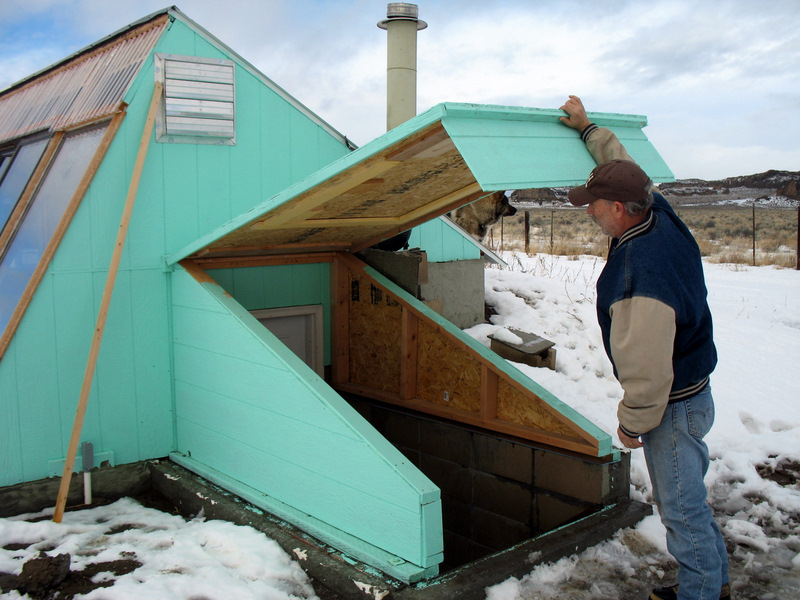
This is a shot from the east side. You can see the cellar style door entrance. The little door on the top opens up, and the top of the wooden structure lifts up on hinges for large items to go in or out. You can also see the chimney. It's rather primitive. I will be working on the stabilization later on. I got the stove pipe and the stove at a garage sale. Notice also on the top left, the air vent cover. It opens and closes when the fan starts and stops.
Here I am showing how the top lifts up.
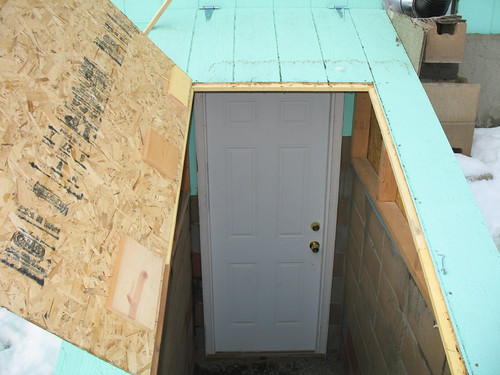
Here is the smaller door opening on the top, leading down the stairs to the full sized metal outside door.
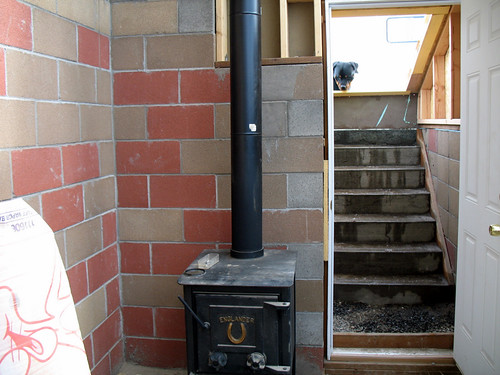
We just walked down the stairs into the greenhouse and turned around and are looking at the steps to show you the stove.
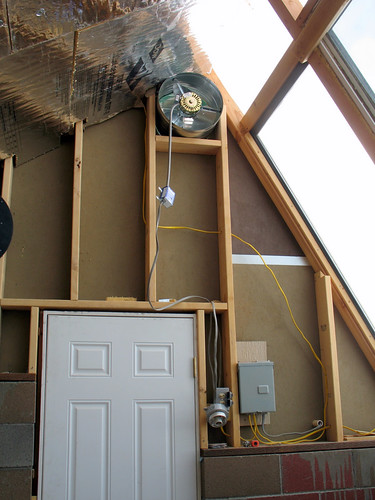
You can see on this wall my electrical panel and the attic vent fan that I have installed. I'm getting ready to put the insulation in.
After I put the fiberglass insulation in on the roof and the sides, I put this additional insulation on to keep the water away from the fiberglass insulation and to increase the light reflection. The shiny stuff is a one inch thick, foam board, 4' X 8' , with a foil outer cover.
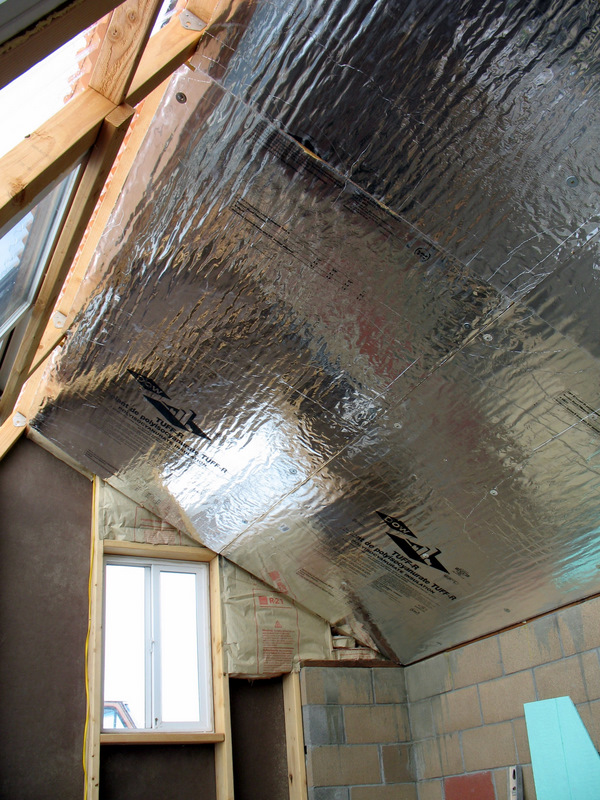
You can see I have started the insulation on the west wall. My next post will show all the finished insulation, with the shiny aluminum coating. Notice the electrical conduit and outlets. These will be used for lights in the winter and possibly soil heaters. I'm trying to keep electrical usage to a bare minimum. I plan to put solar power in as soon as I can.
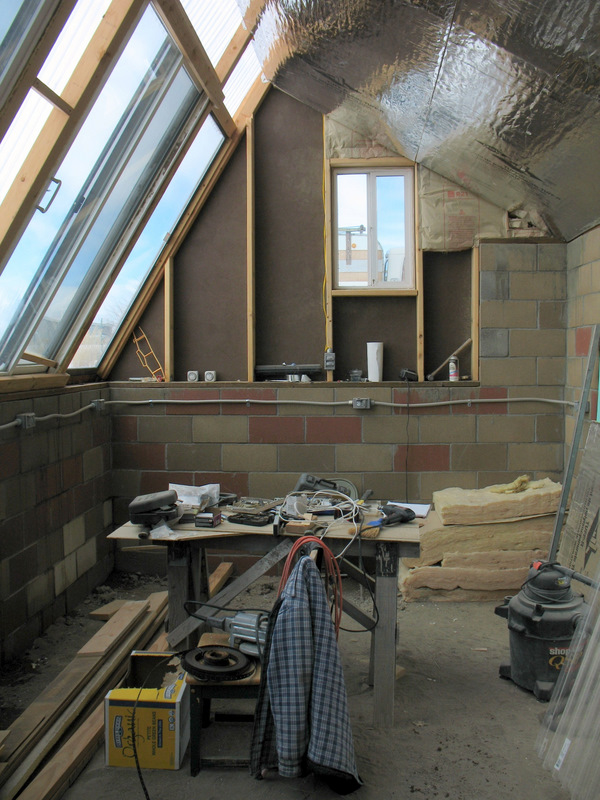
I'm in the process now of organizing the interior. I will be building benches and stadium seating style hydroponic beds. I plan to use the German Mittleider method in the middle. I'll show the benches as I build them. There will be bunkbed style benches on the south side and aquaponic barrels at both ends. I used strong roofing materials because I knew I would be hanging planters from the ceiling. There never seems to be enough room in a greenhouse.


Nice Greenhouse!! Looking forward to seeing your progress. If you need any information about aquaponics please feel free to contact me or visit my website. I am the fellow who wrote the Barrel-Ponics Manual and will help where I can.
ReplyDeleteTravis W. Hughey
http://www.fastonline.org
Travis. You are the first famous person to visit my blog. I've followed your adventures for the last year. I'm very excited about Barrelponics and it is on the top of my important to do list. I printed out your manual about 6 months ago. I've always wanted to come to one of your workshops. You just live so far away. Hope the work is going good in Kenya. I really appreciate the work that you are doing there. God Bless.
ReplyDelete