Saturday, October 31, 2009

Light on the subject

Oct25 029

I've been pretty busy lately with winterizing outside plant beds and getting firewood so I haven't spent as much time in my new greenhouse as I want. I did want to talk about the lights and barrelponics though a little bit. The above photo shows what type light I settled on. It is a 600 watt High Pressure Sodium lamp with a parabolic reflector. I got two of them and boy, does it ever throw the light out. Here is a close up of the underside.

Oct25 023

The reflector is 3 feet across. Should be sufficient. This next photo is taken from the field outside my greenhouse and shows how bright the light is.
Sept20 115

Here's another shot. But in this one notice that I have my insulating panels up to show the contrast.
Oct17 010

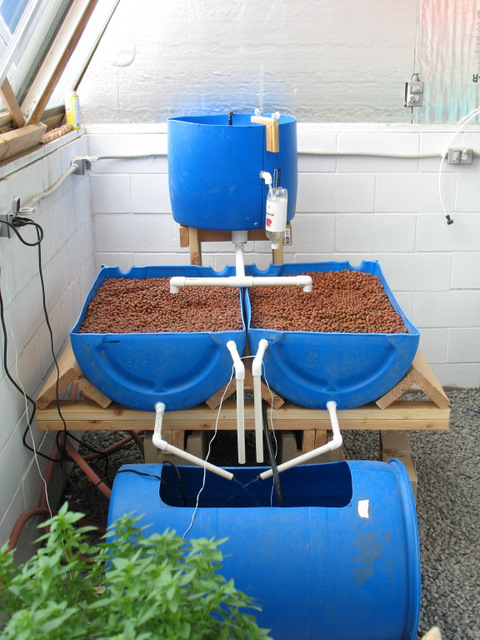
Now back to Barrelponics. The following photo shows a view of the complete system. The bottom tank holds the fish. The top tank is where the water from the fish tank is pumped up to. and the two half barrels, side by side are the grow beds. I have heard that the inventor, Travis Hughey, at http:/www.fastonline.org, is working on a new system that does not need an electric pump and will be bigger. So far this one has been really fun for Hank and I. Thanks Travis!
Oct25 026

Here are my fish in the tank (currently they are goldfish, but someday I want Tilapia). Notice the water draining into the fish tank. It is a natural aerator.
Oct25 024

This last photo is another look at the fish in the tank.
Oct25 028

Saturday, October 17, 2009

Water, Electricity and Lights

I've been busy working on greenhouse projects this summer, but now that things are slowing down I'll be posting on a more regular basis. This picture shows the Ditch Witch I rented to make the ditch that I put water pipes and electrical wire into. Four feet deep was my goal. I attained three feet.
Aug13 012

My ditch was about 120 feet. I was limited initially to 20 amps and now I have 50 amps. The Ditch Witch made the job so much faster than a shovel.
Aug13 011

I was running a hose into my greenhouse for my water supply. With my new ditch, I spliced into my well main water line and now have a faucet in the greenhouse. This will make it easier for winter use. I strongly recommend putting your water lines in when you put your foundation in. It was a lot of extra work. I had to dig down four feet to get under the foundation. This photo shows the pvc pipe prior to going in the ditch.
Aug13 015

Here we are making the water and electric connections prior to filling in the ditch. Hank was a great help and we spent most of the day talking about our next project....barrelponics. Which I will start on the next post. I will sequence building a barrelponics system, from start to finish.
Aug13 019

As you can tell, I have just finished harvesting my summer hydroponics crop. I should have taken a picture. But the exciting thing is...I have lights for the winter crop. I put in two, 600 watt halogen lights with parabolic reflective shields. The picture doesn't do it justice, but I will show you a night photo on the next post.
Sept20 086

Saturday, July 18, 2009

July Greenhouse Update

I've been busy building a couple of small geodesic domes for future cold frames. I just brought a new 200 amp electric service box onto my property for the new greenhouse and future expansions.
June14 015

July17 029

Here are some photos of what is happening with my hydroponics. Things are growing fast. I have everything off fertilizer and I'm just flushing water through the system. I got too excited at first and planted everything at once and now it is all getting ahead of me as far as use. I am going to harvest everything and start some successional planting so that the growth will be staggered. The red sails lettuce was awesome.
July17 036

July17 031

July17 019

Here's what's happening in the grow box.
July17 027

The old, traditional greenhouse looks like a jungle right now.
July17 015

A friend loaned me a few earthboxes to try out. Here is a picture of some tomatoes growing in the earthbox. We've been harvesting since the fourth of July. That was my goal.
July17 005

Wednesday, June 24, 2009

Grow Table Etc.

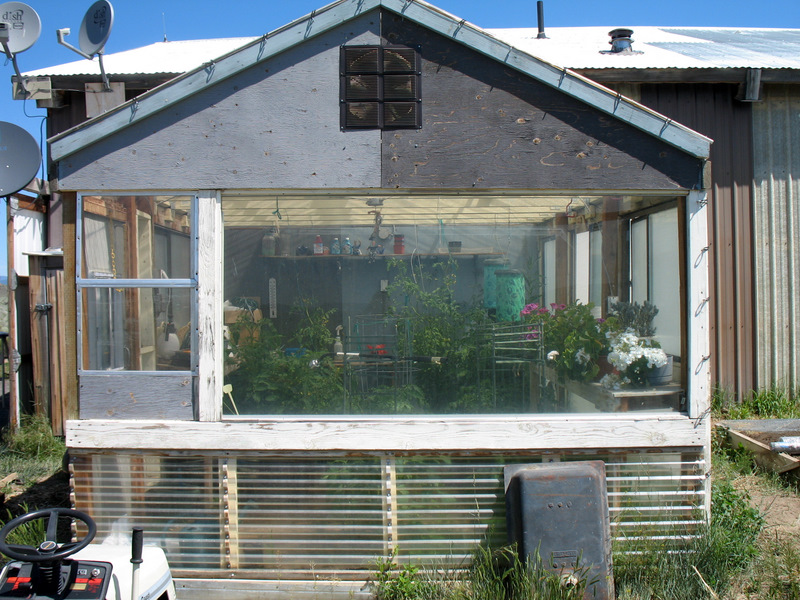
In my last post I said I would show you my old greenhouse. Remember the high desert extreme weather conditions. I built this one about 6 years ago. We mostly use it for tomatoes and zucchini now. I can't grow tomatoes outdoors in this climate because we get a killing frost during any month of the year. It was 27 degrees three nights ago. But with this greenhouse I can keep harvesting tomatoes until Thanksgiving. My goal is ripe ones by the 4th of July. We'll see.
Here you see the south end of the greenhouse. Notice it is attached to my shop at the north end.
June24 024

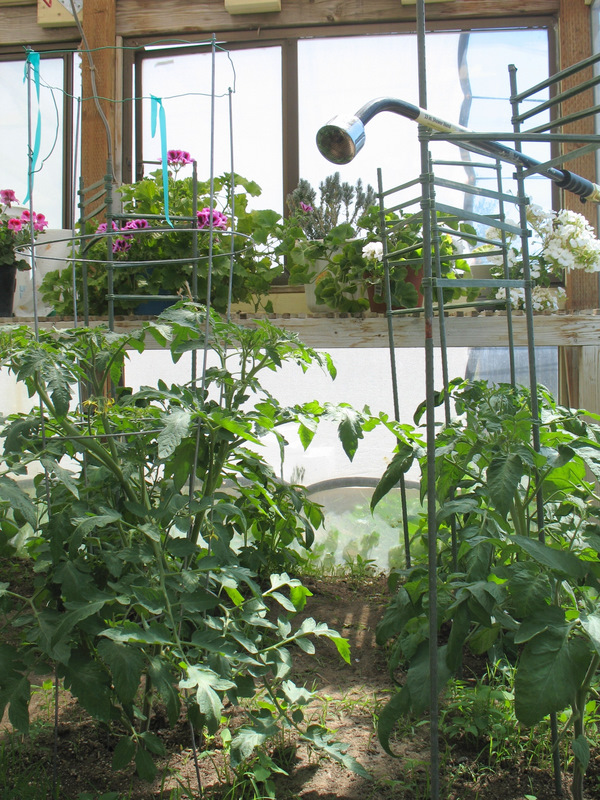
These are Black Russian tomato plants on the left and Brandywine on the right. Both are heirloom varieties. The flowers in the back are on a workbench where I make hanging baskets.
June24 025

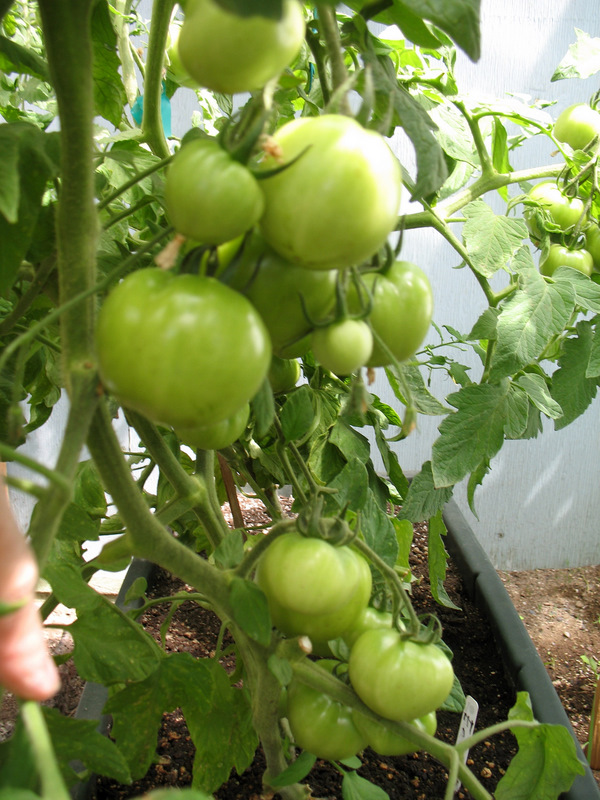
This is a shot of some of the tomatoes on the vine in one of my earthboxes. This is the first year I've used earthboxes. I've always planted directly in the ground. So far everything looks good.
June24 031

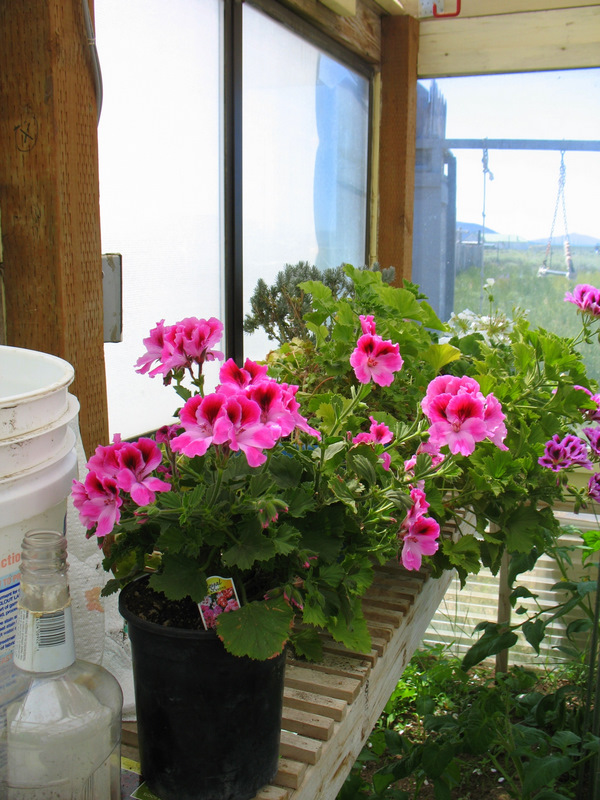
Here are some flowers ready to be planted in baskets. The Martha Washington geranium in the front was purchased for 50 cents from Home Depot because it was almost dead.
June24 032

Now I'll show you the new addition in my new greenhouse. I built this new grow table because I wanted to try gardening by the foot using the mittleider method. However, I've found it's impossible to by bulk fertilizers like they recommend from the old days. I'll be trying different compost teas and different brewing techniques as well as my earth worm castings. When I find good formulas I will pass them on. If you know of any, please share. PS: It is okay and encouraged to comment on this blog. You can see from the photo that the box slants downward toward the front for drainage. I also used metal roofing for the bottom of the box which I covered with the type of ground cloth used to prevent weeds. This is to keep the dirt in the box and not running out thru the drain holes. By the way, this is not really dirt. It is vermiculite, worm castings, lava rock artificial dirt that you can buy in bales. I think it's mostly peat. You must add nutrients to a combination like this. I'm experimenting with making my own organic nutrients.
June24 001

Here it is from the front. I will have a seed bed on the bottom where the wire screen is. And grow lights mounted under the box. I plan to grow carrots, broccoli, cauliflower and turnips in this box. The depth is approximately 18 inches. The other measurements are 4 feet long and 3 feet wide. I'm saving room for my aquaponics project.
June24 003

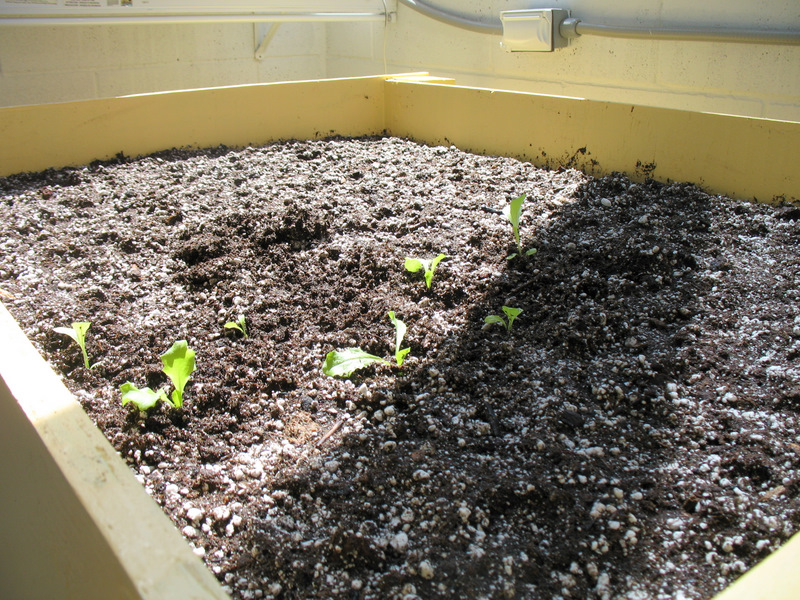
Here is a top view of the box with a few little lettuce seedlings getting ready for the hydroponic bed.
June24 017

My red sails lettuce is about ready for harvest. I'll be cutting back nutrients so that we have full lettuce flavor. The good news is that we just passed the summer equinox and my greenhouse has not gotten so hot as to cause bolting which always happens outside about now. There's been enough natural light and my temps are staying between 60 and 75 Farenheit, even when we have had ranges of 20 degrees to 90 degrees. Remember, I put a 65 degree angle on the south face of the greenhouse. The light goes over the top during the summer and goes straight in during the winter. Also, remember that this is a pit design and it is 4 feet below the ground surface.
June24 021

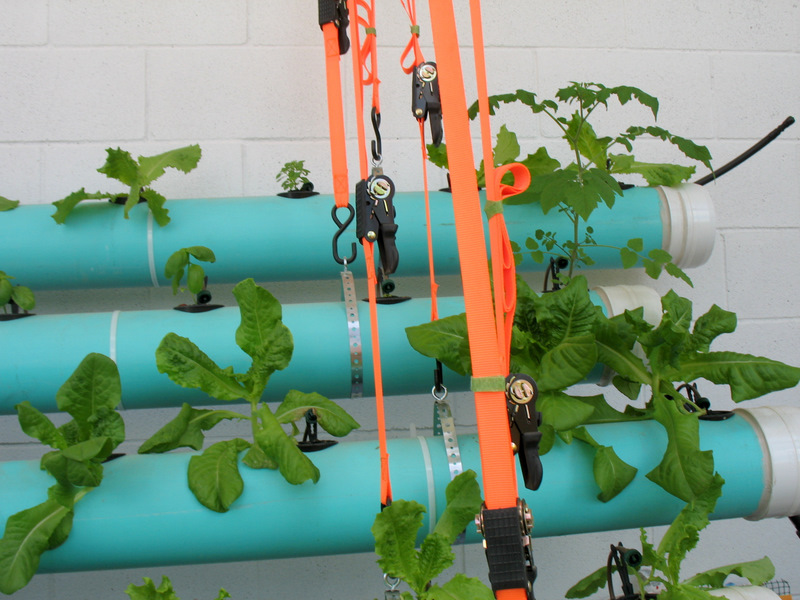
The next two photos show some of the basil, spinach, cilantro and chard as well as more of the lettuce, both buttercrunch and valmaine.
June24 013

June24 013

I am excited at the prospect of continually growing throughout the year. This winter will be a real time of learning for me.

Sunday, June 14, 2009

Growing Update

It's been a while since I have posted. A few of you may be curious how things are growing in the greenhouse. I must admit...I continue to learn what works, and what doesn't. Here are a few things I have discovered, being new to hydroponics.
June14 006

In the above photo, I have red sails and buttercrunch lettuce growing in the hydroponics. What I didn't realize is that it is okay to start the plants in the little peat pots, but you must plant them deep enough in the baskets that you put into the hydroponic tubes or they can flop over. In addition to that I now know that the starts should also be put under lights so they don't stretch for the light and get "leggy". That also makes them prone to flopping over. Plants are good at compensating, but why not get it right? That is what this year is all about. Learning and improving as I go.
June14 008

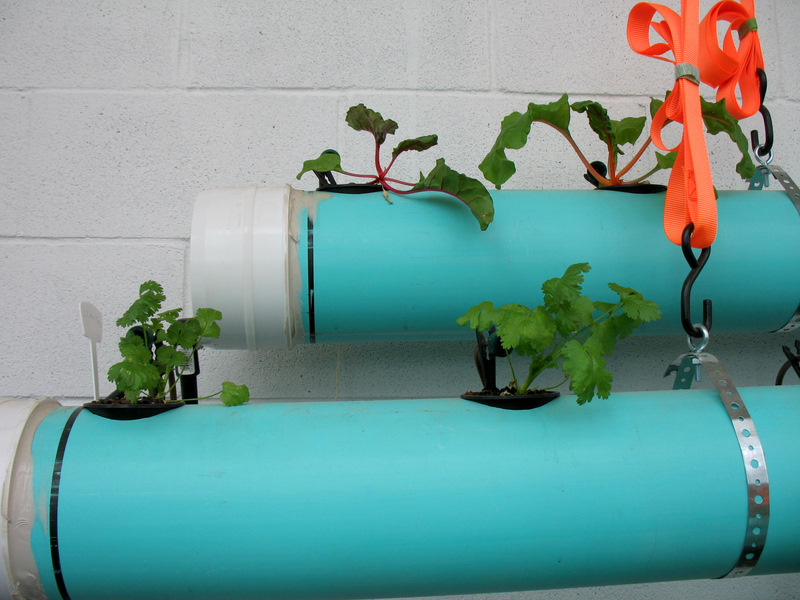
The second photo shows how some of my cilantro and chard is doing. In this third photo, note the lettuce in the uppermost tier is laying over. I will be avoiding this in the future by planting deeper and using lights prior to the plants going into the hydroponics.
June14 005

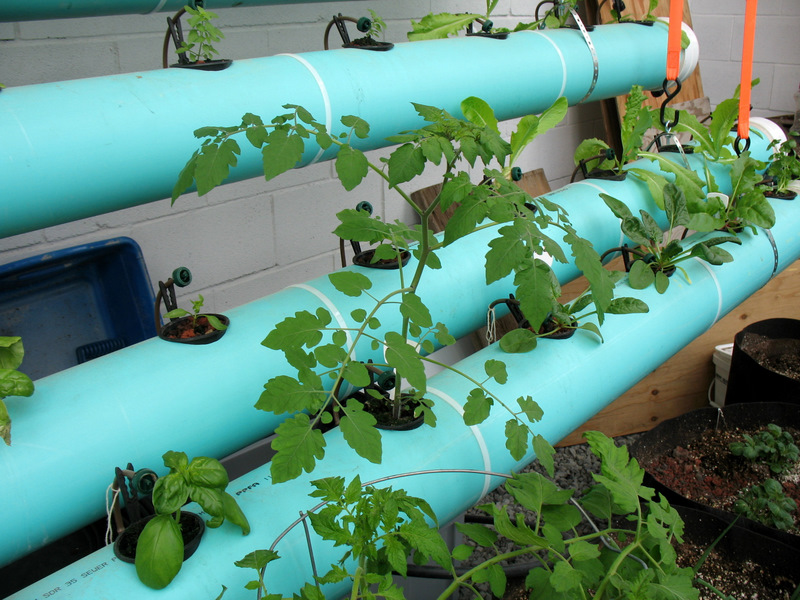
In this photo you can see that my Currant tomato plant is quite happy. Note the basil, spinach, chard and Valmaine lettuce further down.
June14 007

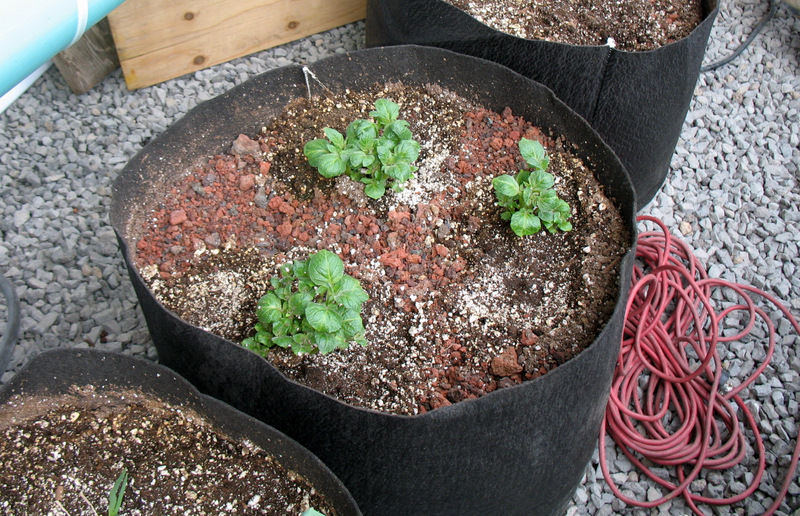
In addition to what has been previously shown, I just added a couple of tubs with growing medium in which I have planted potatoes. Here they are. We'll see how they do.
June14 009

The potatoes are Yukon Gold, which I tried last year and they did well. I want to see what they will do in a greenhouse setting.
All in all, things are changing and growing and I am seeing what works and what doesn't. In the next post, I will show you what is happening in my old greenhouse.

Monday, May 18, 2009

Aeroponics, Drip System, and Ebb and Flow

Aeroponics:

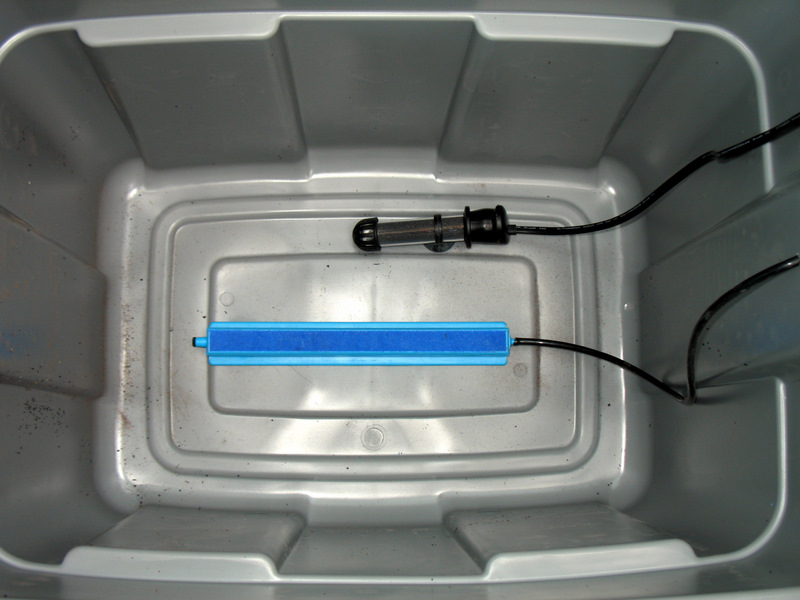
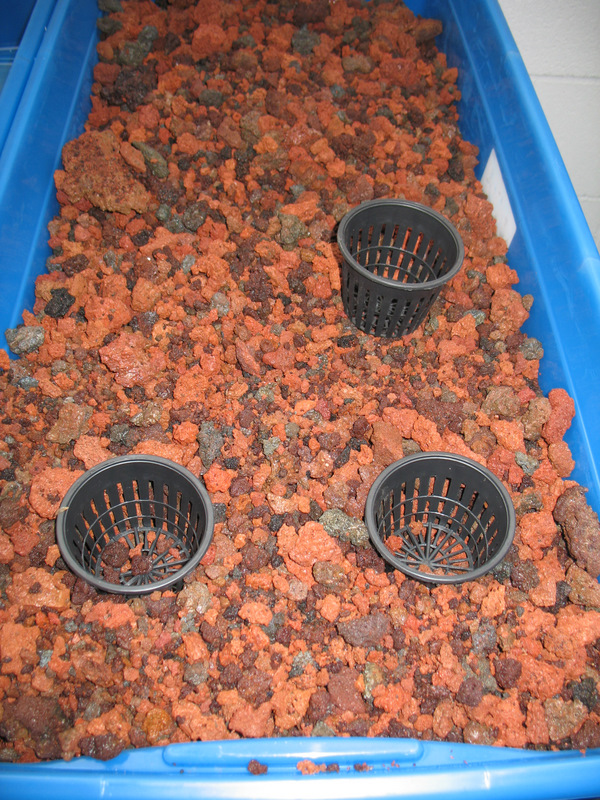
Deep Well...this is a rubbermaid tub with an aquarium airstone and an aquarium heater. All items are inexpensive. I drilled four holes in the lid top and put 3 inch diameter baskets in. There are three cucumbers and a tomato plant in the baskets. Remember, the roots don't stay just in the basket. They expand into the deep well. The idea is that the bubbles will pop and spray the water and nutrients onto the medium holding the roots. I started the seeds in rock wool and peat and placed them in lava rock.
May2 014

Here is what it looks like with the lid off and the water and nutrients cycling.
May18 004

May18 003

These will need to be supported with a trellis system later on.

Ebb and flow:

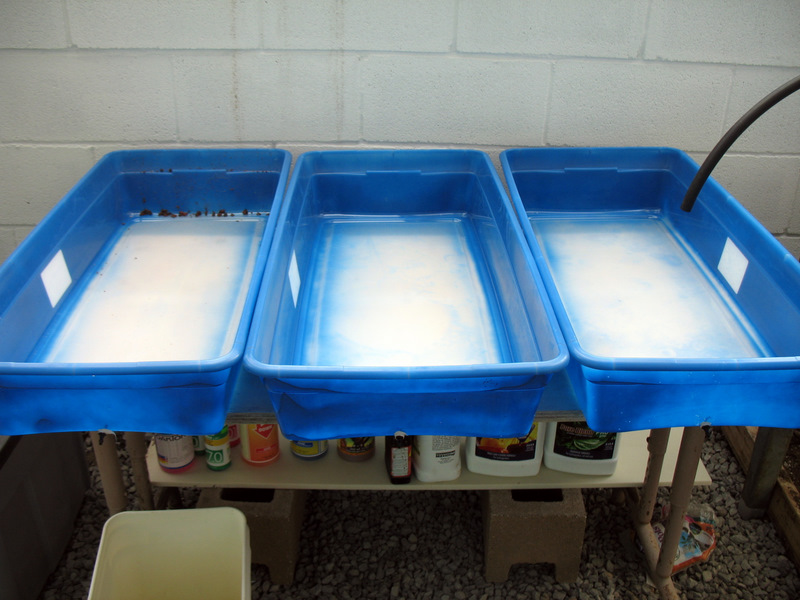
Here are three, inexpensive tubs that I have sprayed the outside blue in order to protect the roots from direct light.
May2 010

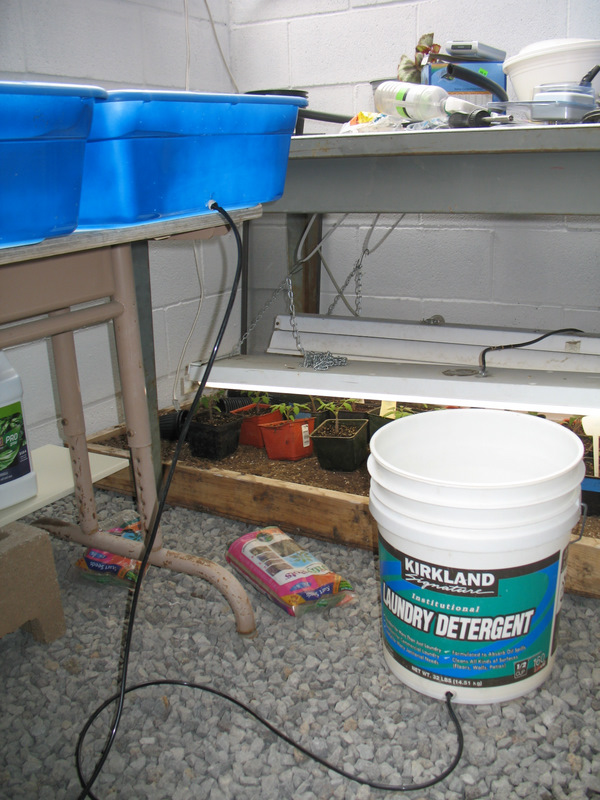
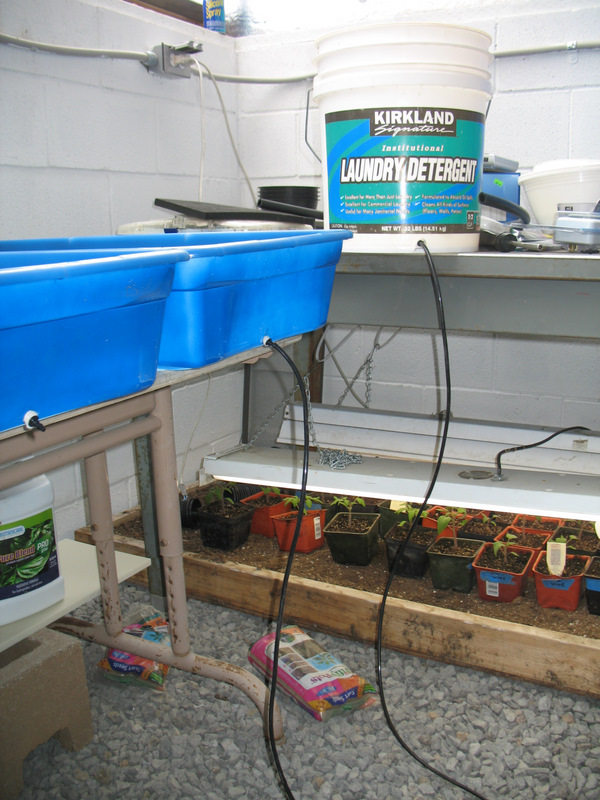
This is a very simple process. Doesn't require a pump or airstone. I plan to be using this as my second stage in keeping the drip system full of plants. Step one is the rock wool in starter trays. Step two is the transfer to the ebb and flow system until true leaves appear. Then they will be transferred to the drip system. This next photo shows the "ebb" part of the system where you lower the bucket so that the nutrient water runs out of the tray. The following photo shows the "flow" part where the bucket is higher than the tray so that the nutrient water flows from the bucket to the tray.
May2 017

May2 016

The next photo shows an example of how the trays will look with pots in them. There will of course be more pots in use.
May2 020

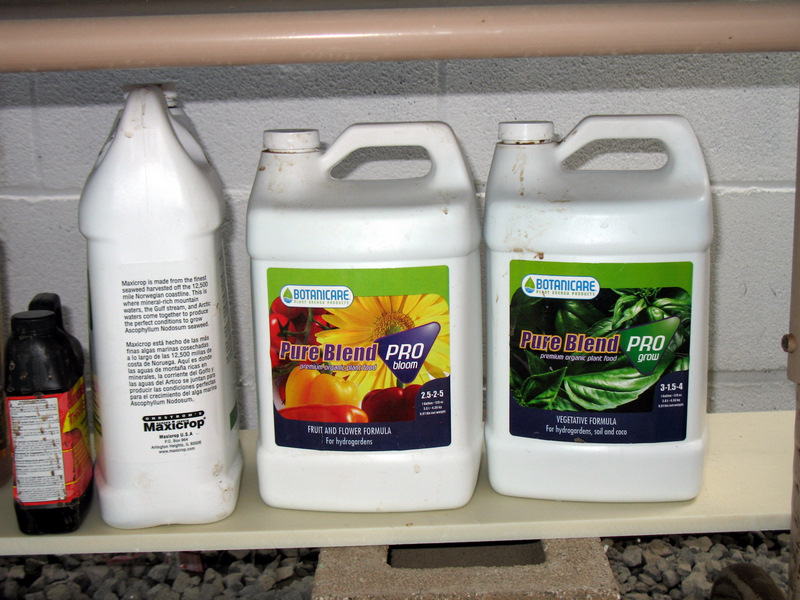
Here are some of the organic nutrients that I am using.
May2 012

Here is the drip system as it looks today with 60 plants in it.
May18 008

An up close photo of the drip in use.
May18 001

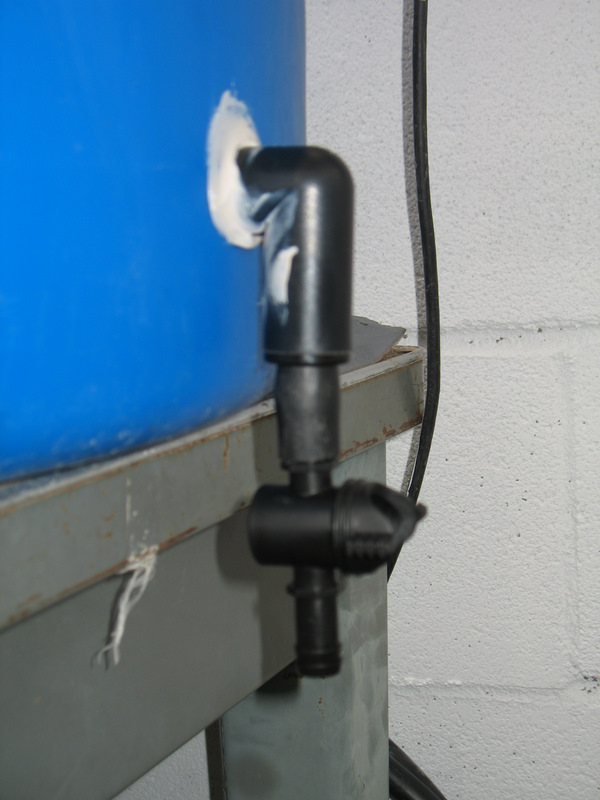
My RO water barrel developed a serious drip so I had to replace the black spigot, with this new one that works great.
May18 009

Saturday, May 2, 2009

Progress on Hydroponics etc.

April29 018

In the last post I showed how we hung the pipes. Notice in this picture that each pipe is suspended by plumbers strap. The reason we did this was to turn the straps completely over so that the adjustments for the raising and lowering of the pipe was not up at the ceiling, but down near the pipe itself. The end that has the adjustment mechanism is rather short and wouldn't go around the diameter of the pipe and still hang on the hook. The plumbers strap solved this problem.

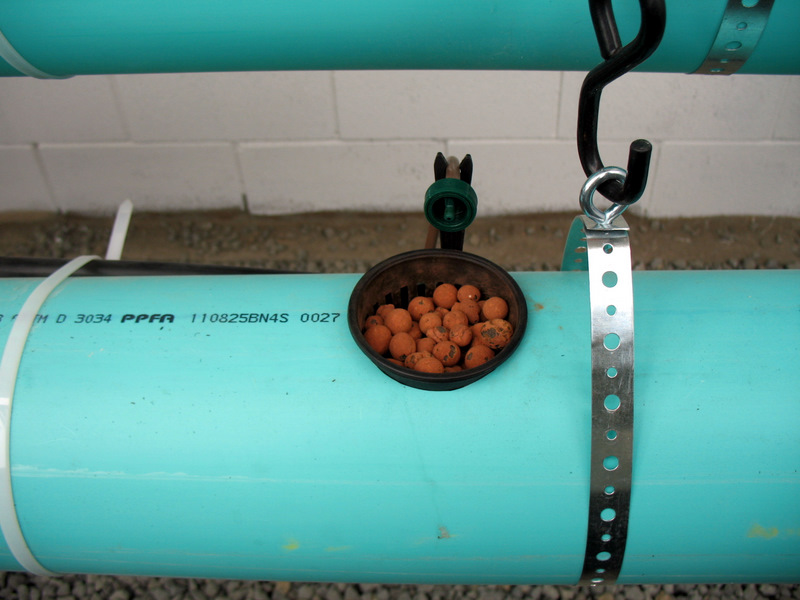
Also note the 3 inch net pot with the drip system in place. We have 66 of these.

April29 032

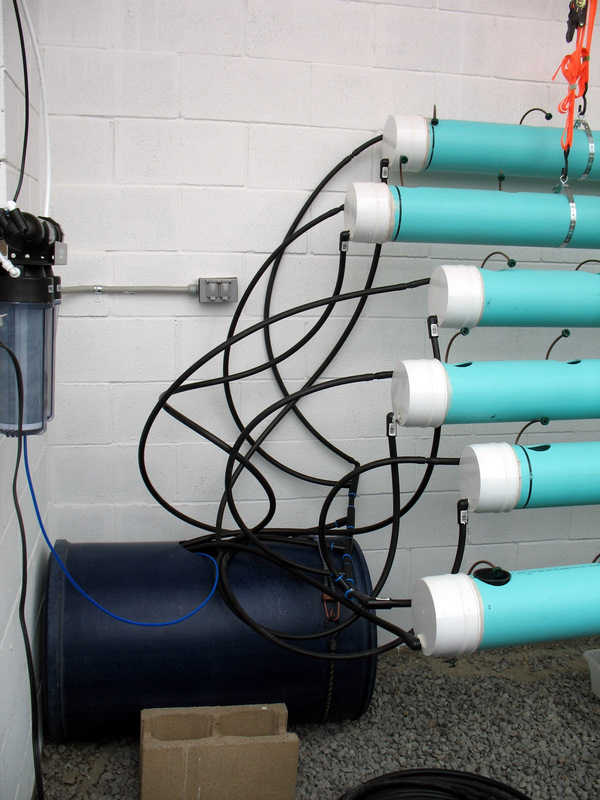
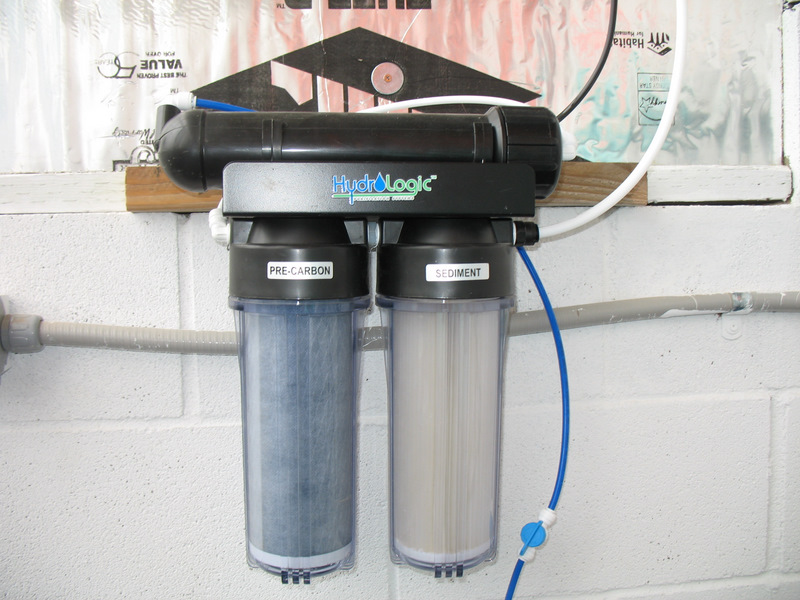
This picture looks confusing, but we are looking at a simple drip system. Notice the RO (Reverse Osmosis) filter on the wall. A hose goes from the filter to the big blue barrel. In the big blue barrel is an aquarium heater, an airstone, and a water pump. Look at the manifold. That is the piece that feeds all the different lines to each pipe. We left enough length on each connection so that we can independently raise or lower each pipe. It looks tangled because there are also drain lines coming back from the pipes into the blue barrel. So, simply put, we have a little brown line running along each big green tube with a drip nozzle set up at each planting hole. The water drips in giving nutrition and water(air also) to the roots. Then it all flows back into the big blue barrel. This will be set on a timer to water as needed.

Reverse Osmosis filter.
April29 029

May2 007

May2 006

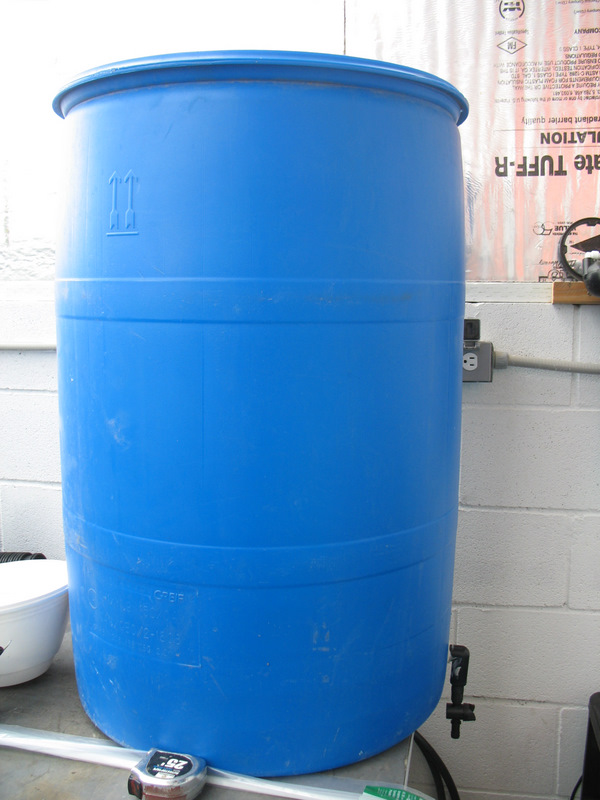
This big blue barrel, sitting on the table is really important. The RO system is really slow. We're lucky to get 20 gallons a day. Now, the blue barrel on the floor is where I put in my nutrients, and keep full of the filtered water. But you need lots of filtered water. I'll be using the filtered water for the deep wells, which I will explain later (aeroponics), and the simple ebb and flow system and also I use this water for watering houseplants and seedlings. When the barrel on the floor is full, I then start filling the additional barrel resevoir on the table. Notice it has an off and on spout. This allows gravity feed, when needed, to different systems.

May2 024

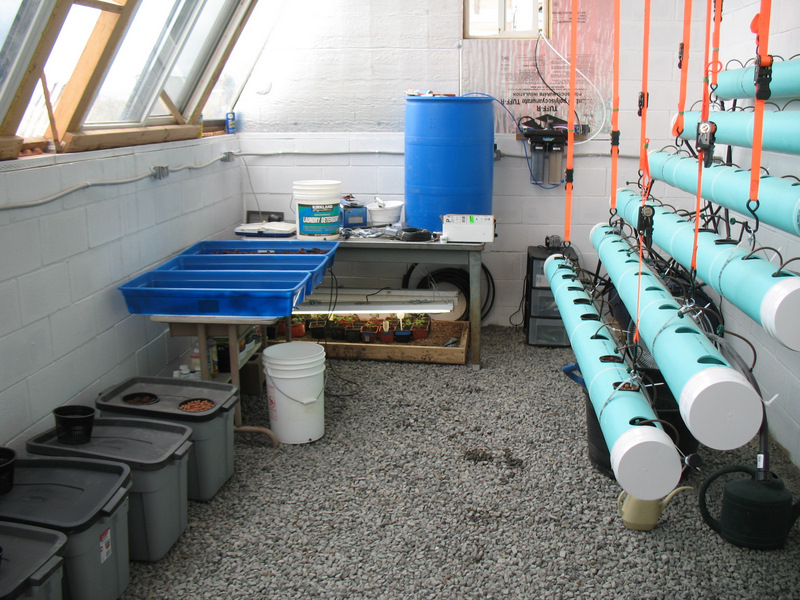
Here is a photo of my greenhouse at present. My next post will show the ebb and flow system and the aeroponics system, as they are being made. The gravel on the floor has really turned out to be perfect, because of all the water I've been spilling. I turned on the drip system and there are no leaks! So far, so good. All questions or suggestions are welcome. I just started 75 seeds to be put into the systems soon.